My Classic Christmas Tablescape | 2019

Classic Christmas Tablescape by ConfettiStyle


I love creating tablescapes, especially at the holidays.  There is just something special about gathering family around a beautifully set table and celebrating Christmas.

This year my table decor is classic and traditional and includes a fun mix of dinnerware. Let’s gather around the table and celebrate the season!

Christmas Table Decor

CLASSIC CHRISTMAS TABLESCAPE

One of my favorite details at the table are the small evergreen wreaths that hang on the back of each chair.  The vibrant green wreath paired with a red satin ribbon really pops.

Classic Christmas Tablescape by ConfettiStyle

Because I have a lot of blue and white ceramic decor in my living room, I decided to use a mix of red and blue on the table.  I draped the table in a blue and white tablecloth and added a red runner down the center.

Then I created the centerpiece.

Since my place settings have a traditional vibe, I wanted the centerpiece to be a bit more whimsical. I placed a grouping of glass and ceramic Christmas trees down the center of the table and tucked greenery and berry sprigs at the base.

A few red ornaments and mini white ceramic trees add more visual interest.

Christmas Place Settings by ConfettiStyle

ENTERTAINING TIP:  Scented candles can interfere with the flavors of the food being served.  Instead of candles, mix fresh evergreen sprigs in with faux stems to add a festive scent to the table.  

Classic Christmas Tablescape by ConfettiStyle

Holiday Table Decor by ConfettiStyle

Glass and Ceramic Christmas Tree from HomeGoods

Classic Christmas Tablescape by ConfettiStyle

I used faux evergreen placemats as the base of each place and mixed different dinnerware pieces for an eclectic look.  The red tartan plaid melamine plates look great with my formal white, red and blue willow plates.

At top of each place setting I folded red napkins in the shape of a bow with my thrifted green beaded napkin rings as the center.

Classic Christmas Tablescape by ConfettiStyle

Placemats from Pier (no longer available) // Plaid Dinner Plates

Classic Christmas Tablescape by ConfettiStyle

TABLESCAPE TIP:  Layers help to create a table that is appealing from every angle.  Consider each layer, from the tablecloth up to the top of the centerpiece.  Use items with different textures and finishes to make the tablescape come to life. 

Classic Christmas Tablescape by ConfettiStyle

Gold Flatware–vintage (similar here)

Christmas Decor by ConfettiStyle

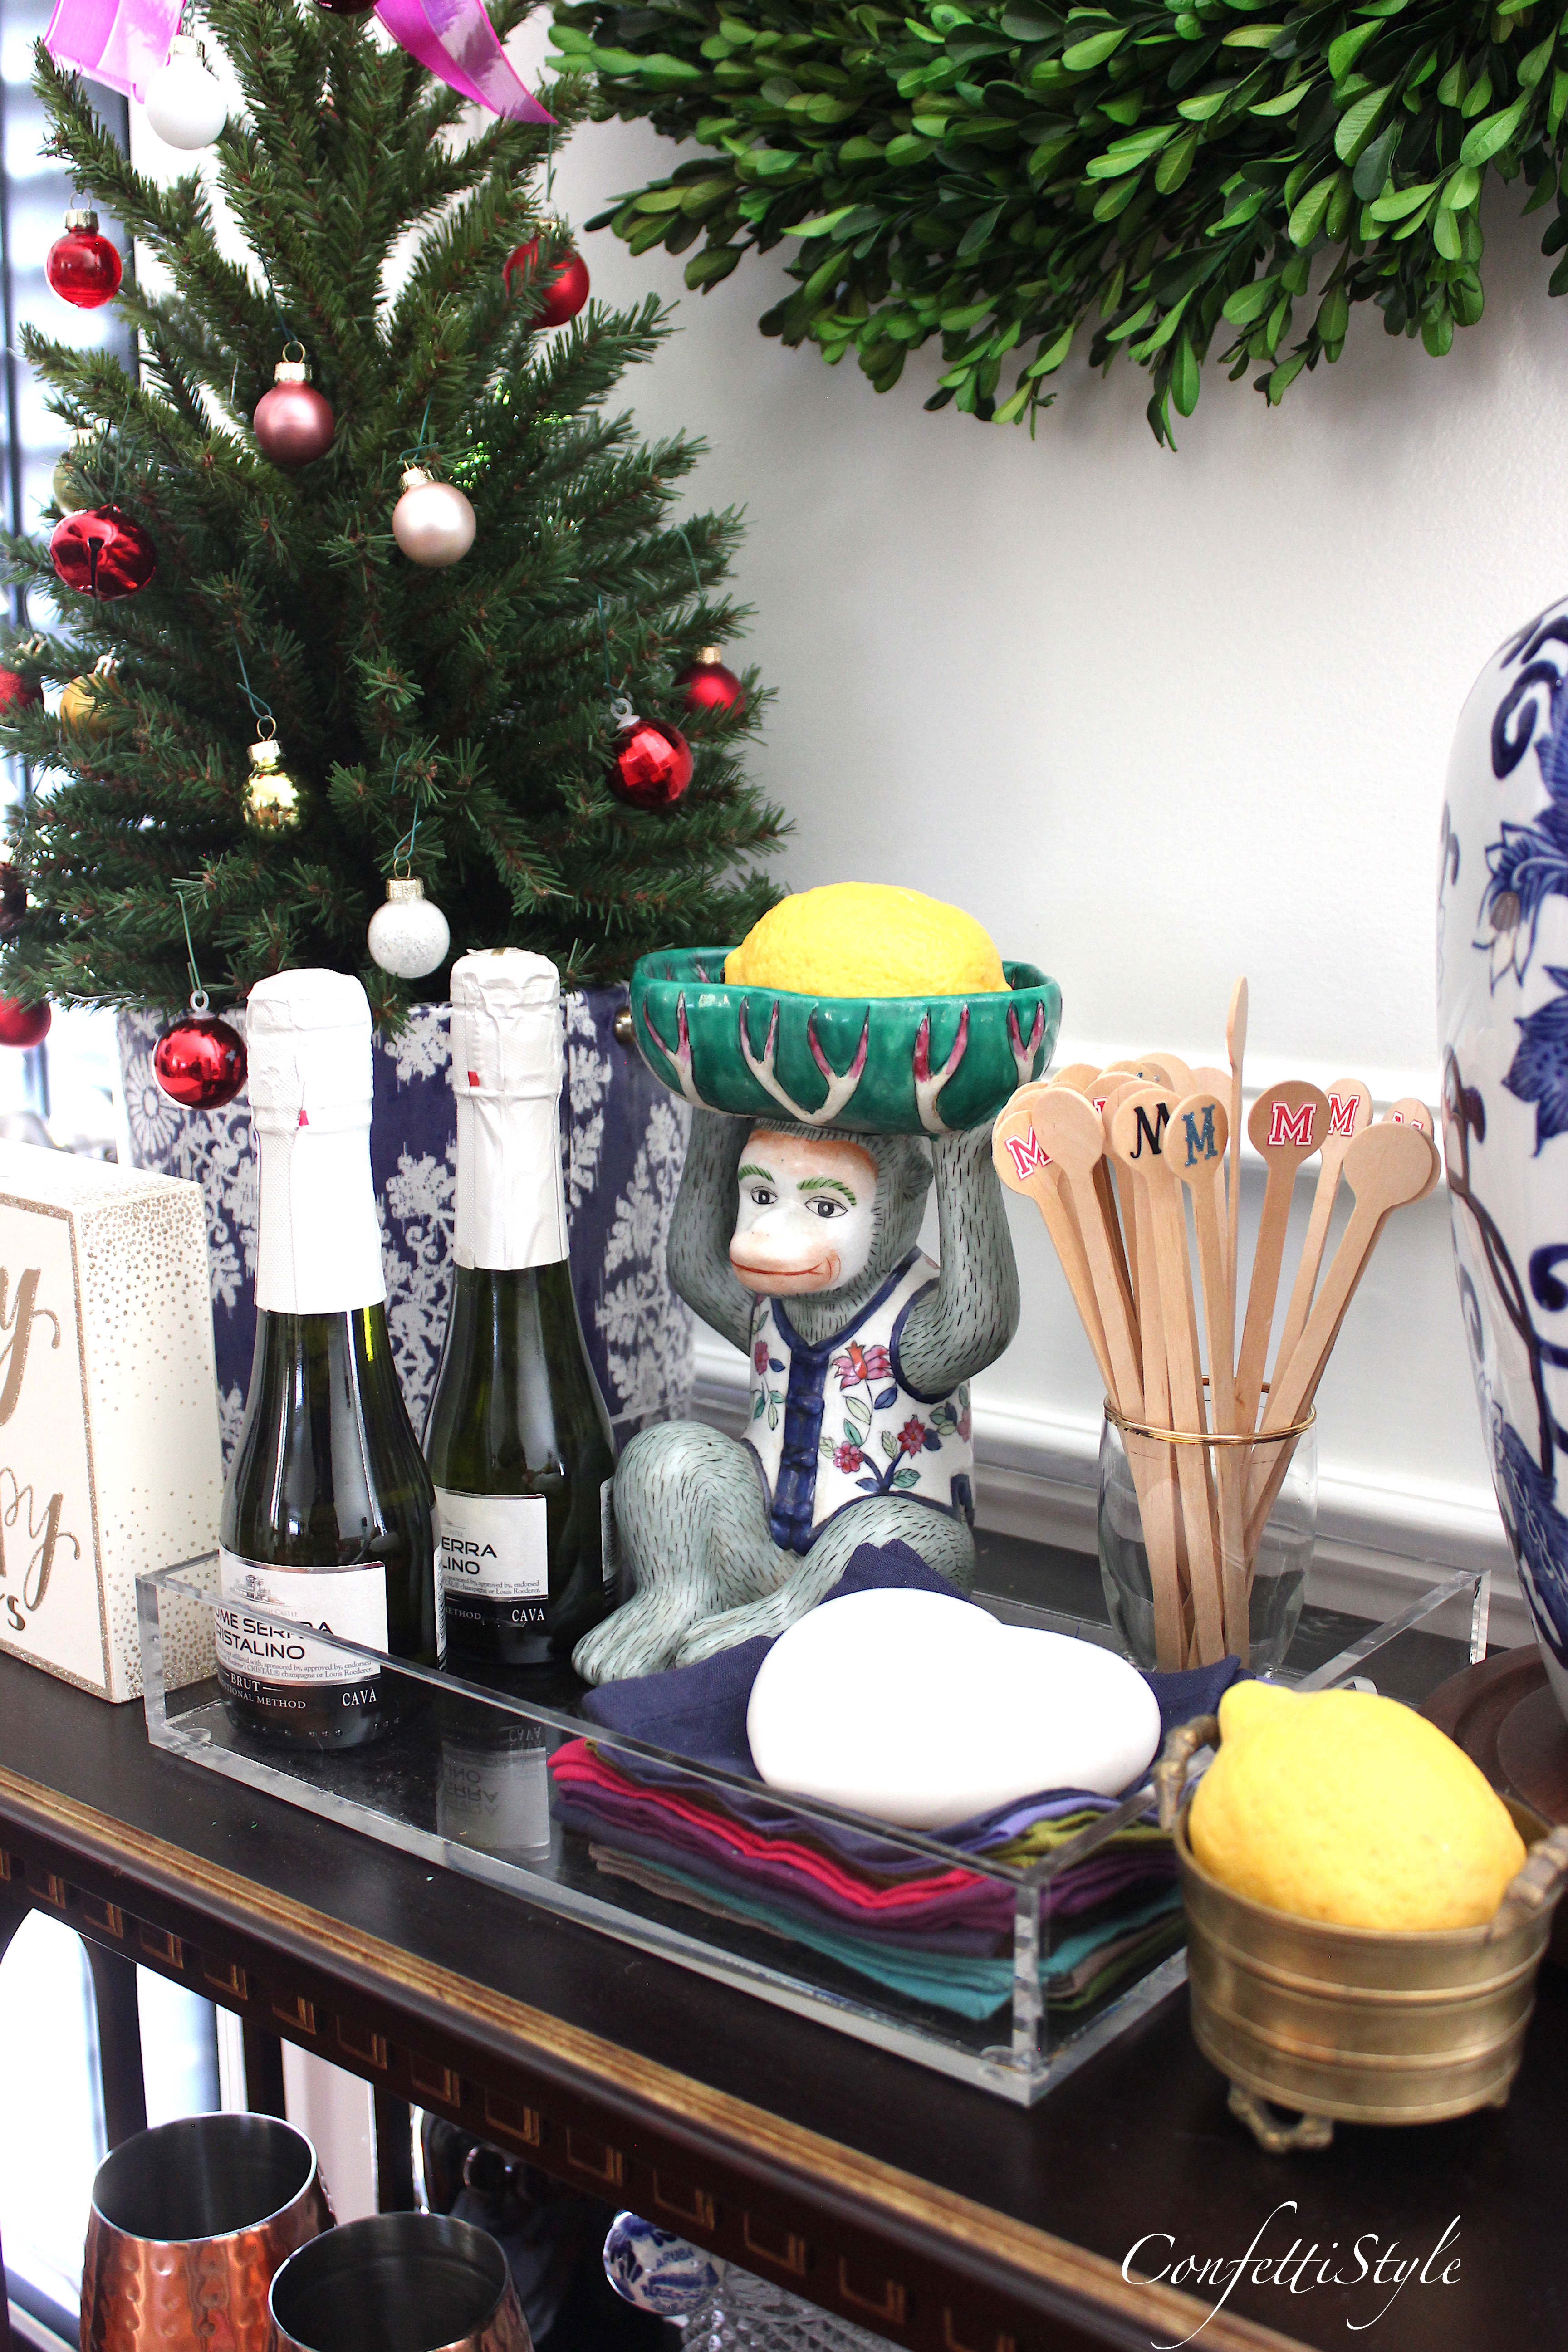
My sideboard and tiered bar table got a festive touch with greenery and red ornaments.

Holiday Entertaining With ConfettiStyle

CHRISTMAS AROUND THE TABLE

Classic Christmas Tablescape by ConfettiStyle

Classic Christmas Tablescape by ConfettiStyle

Classic Christmas Tablescape by ConfettiStyle

Now that I have the table all set, I’m working on my dinner and dessert menu. Wish me luck as I tackle Costco and the grocery store tomorrow.

Cheers!


For more tablescape inspiration check out these posts:

2018 Christmas Tablescape

2017 Christmas Tablescape 

My Holiday Home | Merry & Bright Holiday Home Tour-Part 2

Merry & Bright Holiday Home Tour--Part 2 by ConfettiStyle


Welcome back to part 2 of the Merry and Bright Holiday Home Tour.  Last week I shared my tree, Christmas stockings and other elements of our living room decor.  This week I’m back to share my Christmas tablescape and a few holiday touches I added to the kitchen and master bedroom. If you missed part 1 of the tour, you can find it here.  And you’ll find a list of all the participating bloggers at the end of this post.

If you’re coming over from Love Your Abode welcome.  I hope you enjoyed Yuni’s holiday decor as much as I did.  And if you don’t already follow her on IG, you can find her here.  She shares lots of great decorating and recipe ideas on her feed.

Merry & Bright Holiday Home Tour--Part 2 by ConfettiStyle

rocking horse from HomeGoods

This gorgeous Christmas stocking is from Boho Luxe Home who sponsored this year’s Merry & Bright Holiday Home Tour.  Be sure to head over to their website to check out the amazing array of boho inspired decor, gifts, textiles and wallpaper.

Now let me show you my holiday tablescape…

I carried my blue and white holiday decor theme into the dining area and used it to inspire by table decor.  The first layer of the table is a blue & white tablecloth and solid blue table runner.  The centerpiece is greenery swag with three pillar candle holders.   I added additional greenery pics to fill out the arrangement and scattered ornament clusters at the base of the center candle.

Merry & Bright Holiday Home Tour--Part 2 by ConfettiStyle

For the place settings,  I placed my Blue Willow plates on top of white charger plates.  Solid blue salad plates and blue & white bread plates add the final layer.  The pink dinner napkins add a pop of color and tie back to some of the wrapping paper I’m using for gifts.

Merry & Bright Holiday Home Tour--Part 2 by ConfettiStyle

BLUE & WHITE CHINOISERIE INSPIRED TABLE

Merry & Bright Holiday Home Tour--Part 2 by ConfettiStyle

I love adding a fun touch to the backs of my dining chairs. This year I created chair ties using navy tassels, green satin ribbon and ornaments.  Such a fun and easy way to dress up my chairs.

Merry & Bright Holiday Home Tour--Part 2 by ConfettiStyle

Merry & Bright Holiday Home Tour--Part 2 by ConfettiStyle

The side board arrangement is fairly simple with a grouping of mini Christmas trees, ginger jars, greenery and ornaments.  For a touch of pink, I tucked a couple of faux peonies at each end of the arrangement. I hung plain garland  around the top of the mirror.

Merry & Bright Holiday Home Tour--Part 2 by ConfettiStyle

Merry & Bright Holiday Home Tour--Part 2 by ConfettiStyle

Here’s the table looking down from the stairs.

Merry & Bright Holiday Home Tour--Part 2 by ConfettiStyle

Merry & Bright Holiday Home Tour--Part 2 by ConfettiStyle

THE COCKTAIL BAR

My bar table sits in a corner of the dining area and it got a holiday touch.  The large monkey dish I scored at an estate sale always gets in on the holiday fun.

Merry & Bright Holiday Home Tour--Part 2 by ConfettiStyle

Merry & Bright Holiday Home Tour--Part 2 by ConfettiStyle

THE KITCHEN

One one wall in the kitchen sit this tiered table that holds my overflow of dinner and dessert plates. I hung a wreath on the wall between two botanical art pieces.  I’m planning to paint the frames black but somehow it keeps getting pushed down my to-do list.

Merry & Bright Holiday Home Tour--Part 2 by ConfettiStyle

Here’s a little collection of goodies on the kitchen counter, next to the stove.

Merry & Bright Holiday Home Tour--Part 2 by ConfettiStyle

Now let’s head upstairs…

MASTER BEDROOM

Merry & Bright Holiday Home Tour--Part 2 by ConfettiStyle

Every year I hang garland and wreath on the headboard and this year was not exception.  I bought this beautiful felt wreath at HomeGoods last year and love the texture and sparkle.

Merry & Bright Holiday Home Tour--Part 2 by ConfettiStyle

I bought two of these holiday pillows from Pottery Barn a few years ago and used one on the bed.  Next year I’ll add colorful tassels to each corner of the pillow to give it a new look.

Merry & Bright Holiday Home Tour--Part 2 by ConfettiStyle

I placed a small tree next to the armoire and decorated it with silver, gold and champagne colored ornaments.  I also draped satin ribbon through the branches to add softness.

Merry & Bright Holiday Home Tour--Part 2 by ConfettiStyle

Merry & Bright Holiday Home Tour--Part 2 by ConfettiStyle

Thanks so much for stopping by today!

I hope you enjoyed my holiday home. The next stop on the tour is Positively Southern. You’re going to love all the beautiful decor Tamyra is sharing this week.

Here’s the entire Merry & Bright Holiday Home Tour lineup…

Wendy–Farmhouse Therapy   (IG @farmhousetherapy)

Marsha–M.Jones Style  (IG @mjonesstyle)

Kate–Chic On A Shoestring Decorating  (IG @chiconashoestringdecorating)

Meg–Green With Decor (IG @greenwithdecor)

Yuni–Love Your Abode   (IG @loveyourabode)

(me) ConfettiStyle   (IG @confettistyle)

Tamyra–Positively Southern   (IG @positivelysouthern)


For more even more holiday inspiration, over to the Merry & Bright Holiday Home Tour Pinterest board.  You’ll find photos from previous years tours as well as tons of other holiday and entertaining inspiration.


disclosure:  I received products from Boho Luxe Home to use in my Christmas decor.  I am a big fan of this company and only share products and brands that I love and think you’ll like too.  All opinions are my own. 

DIY Embroidery Hoop & Ribbon Christmas Wreath

DIY Embroidery Hoop & Ribbon Christmas Wreath by ConfettiStyle

Happy Monday friends! I’m so excited to share the latest ribbon project I created for the The Ribbon Roll.  For those of you that may have missed it, I’m on the design team for The Ribbon Roll, an online retail store that sells over 15,000 different styles of ribbon. As a member of the design team, I create projects using their ribbon and share them on their blog.  If you like crafting with ribbon, check out the blog for fun seasonal and everyday project ideas.

My latest project, an Embroidery Hoop & Ribbon Christmas Wreath is one of my favorite holiday projects ever. I am in love with the way it turned out and can’t wait to hang it in my home.

DIY Embroidery Hoop & Ribbon Christmas Wreath by ConfettiStyle

My wreath features beautiful metallic and lame ribbons but you could use just about any of the Ribbon Roll ribbons to customize the look for your home or any season.

For all you crafters out there, here’s a step-by-step tutorial and the supply list so you can make your own wreath.

***

EMBROIDERY HOOP & RIBBON CHRISTMAS WREATH

Supply List:

  • Large Embroidery Hoop–before buying new, check your local Goodwill where you can usually find these large hoops for less than a $2.00
  • Golden Grenada Wired Edge Ribbon–you’ll need about 2 yds for wider ribbon and about 3 yards for narrower ribbon
  • Metallic Lame Tweed Wired Edge Ribbon (see ribbon yardage above)
  • Glitter Leaves–there are 50 pieces in the pack so you’ll have lots left over to use on other projects
  • 4 to 6 Faux Evergreen Pics—you can buy these from Micheal’s, Hobby Lobby or JoAnn right now for 50-60% off.  I always stock up when they go on sale/clearance.
  • Merry Christmas Wood Die-Cut –I bought my piece at Michael’s but I’ve also seen similar at Target in the dollar bins
  • Acrylic Craft Paint—available from any craft store
  • Foam Paint Brush
  • Floral Wire
  • Hot Glue Gun and Glue
  • Small Ornaments (optional)

DIY Embroidery Hoop & Ribbon Christmas Wreath by ConfettiStyle

HOW-TO:

  • Cut  the ribbon into lengths 2” longer than the widest point of the embroidery hoop.  The number of ribbon pieces you’ll need will depend on the size of your embroidery hoop and the width of your ribbon.  You’ll want to cut enough ribbon strips to fill the embroidery hoop.
  • Open your embroidery hoop and separate the two pieces.
  • Lay the one pattern of ribbon spaced out over the inside (smaller) hoop.  Then criss-cross the second ribbon to create a woven look.
  • Once all the ribbon is in place, slide the larger hoop over the smaller hoop and tighten the hoop down. If you need to adjust the ribbon position, loosen the hoop a little, move the ribbon around and re-tighten the hoop.  Once the ribbon is secure, trim away any excess ribbon around the backside of the hoop.

DIY Embroidery Hoop & Ribbon Christmas Wreath by ConfettiStyle

  • Using your floral wire, attach the greenery pics to the hoop.  You can place the pics at the top, bottom or slightly off-center like I did.

DIY Embroidery Hoop & Ribbon Christmas Wreath by ConfettiStyle

  • Paint your Merry Christmas die-cut using your craft paint.  I painted mine in a metallic gold.
  • Using your hot glue gun, glue the die-cut piece on top of the ribbon, in the center of the hoop.
  • Stick a few glitter leaves into the greenery pics in any layout you like.  I placed mine where the greenery pics meet in the middle.
  • (optional) Embellish the wreath with mini ornaments (attach them using your hot glue gun).

Tip:  If you place your greenery pics off-center like I did, the wreath will be heavier on one side.  So that the wreath hangs straight, use two nails spaced about 3 inches apart.

DIY Embroidery Hoop & Ribbon Christmas Wreath by ConfettiStyle

That’s all there is to it.  Happy crafting!


For more ribbon fun, check out these ribbon projects:

Christmas Bow Made From Ribbon

Tassel Ribbon Gift Tie

Fringe Napkin Rings


It’s A Blue Christmas | Merry & Bright Holiday Home Tour – Part 1

Happy Holidays and welcome to the 4th Annual Merry & Bright Holiday Home Tour.  This year I’m joining 6 of my blogging friends to share lots of holiday decor and entertaining inspiration with you.  There’s a list of all the participating bloggers at the end of this post.

Before we get this party started, I want to give a shout out to Boho Luxe Home who is sponsoring the holiday home tour again this year.  Kellie and Melanie have an amazing company with some of most personality packed home decor items I’ve ever seen.  This year, each of the participating bloggers received products from Boho Luxe Home to include in their decor.  I know you’re going to love the pieces I picked out and I hope you’ll pop over to their shop to see their full product offering.

 If you’re coming over from Positively Southern, welcome.  I always love seeing Tamyra’s holiday decor and this year she’s really outdone herself.  She has a beautiful home and come Christmas time it’s even more gorgeous.


Every year I start my holiday home tour by sharing the inspiration for my decor.  This year the jumping off point for my theme was all of the blue & white accessories I have in my home. I love blue & white and have curated quite the collection ever since I started decorating with it about 5 years ago.  The color theme is now the foundation of my decor and I don’t see getting tired of it anytime soon.

I also wanted to add some vibrant color to my holiday mix so I chose green and pink as accents.  I’m so happy with how everything looks and can’t wait to share all the details.  But before we do that, let’s take a look back at the inspiration boards I created earlier this year. I think I executed the plan pretty well.

THE INSPIRATION

***

A Blue & White Christmas

Decorating my Christmas tree is a labor of love and it’s all about the details. I kept things pretty simple this year and decorated with just ornaments and ribbon.  The tree 7 1/2′ tall and there are close to 250 ornaments on it.  The blue & white ginger jar ornaments are my absolute favorite and set the tone for the tree. I also used different shapes of solid colored ornaments along with crystal and glass ornaments that I’ve had for over 20 years.  It was so fun pulling them out of the box and remembering where and when I bought them.

Every year I use two or three different styles of ribbon on my tree.  This I combined a gorgeous velvet and a shiny satin.  The navy velvet is from Frontgate and the emerald green satin I found at a discount store for just $3.00 a spool. The ribbons billow in and out of the tree adding softness and visual movement.  And you can’t tell in these photos but there are twinkle lights on the tree which make it magical at night.

Most of my blue ornaments came from Hobby Lobby and the white ornaments are from Ikea. If you didn’t know that they carry Christmas decor, they do and it’s great.

CHRISTMAS GIFT WRAP

I’ll be sharing my DIY Holiday Wrapping Crate and more gift wrap inspiration later this week, but here’s a sneak peek.

Now let’s move over to the fireplace.  We have a mantel sitting in our garage and I had planned to get it installed this year but it just didn’t happen. So without a mantel, I draped my garland around the fireplace using Command Hooks to hold it in place. I wove the satin ribbon throughout garland and added clusters of ornaments throughout.  And I made a big bow to highlight the center of the garland.

I shared this holiday decorating tip last year but it’s worth sharing again.  Clustering ornaments in groups of three or four is a great way to add impact on a tree or garland.

The only decor I added to the bookshelves flanking the fireplace was to hang a wreath at the center, on each side.  And I hung a Boho Luxe Home Christmas stocking above each cabinet. Aren’t these stockings just gorgeous?  The bottom fabric is the Neela Blue fabric and the top collar is a navy velvet.  The finishing touch is the long handmade tassels that’s wrapped around the hanging loop.  These stockings have definitely become some of my most treasured holiday decor!

green wrapping paper //  holly leaf from Hobby Lobby

The stocking were hung…

mini Christmas tree from Target dollar spot

The wood rocking horse that I found at HomeGoods last year is all dressed up for Christmas too.  This little horse just puts a smile on my face.

I replicated the mantel garland along the stair rails which run from the 2nd floor of our townhouse to the third floor (aka–lots of garland and ornaments)!  I’ll share more of my stair decor next week in the holiday home tour finale.

With my mom now living in Atlanta and my house fully decorated for the season, I’m planning on sitting back and enjoy every bit of this Christmas season.  I hope you enjoyed the tour.  Be sure to come back next Wednesday for the final of the Merry & Bright Holiday Home tour and more decorating inspiration.

Next up is Love Your Abode.  Yuni is an absolute sweetheart with design talent oozing out of every pore.  I love following her on IG stories and love her style.  Don’t delay, head over to Yuni’s blog and check out our holiday home.  And be sure to stop by the other bloggers on the tour and show them some love.


Merry & Bright Holiday Home Tour Participants:

Tamyra @Positively Southern

Me @ConfettiStyle

Yuni @ Love Your Abode

Wendy @Farmhouse Therapy

Meg @ Green With Decor (blow kisses to her new baby)

Kate @Chic On A Shoestring Decorating

Marsha @M. Jones Style


disclosure:  I received products from Boho Luxe Home to use in my Christmas decor.  I am a big fan of this company and only share products and brands that I love and think you’ll like too.  All opinions are my own. 

My 2018 Christmas Theme | Chinoiserie Inspired

Happy, Happy Friday!  Today’s blog post is one of my favorites to share each year.  It’s my annual Christmas theme post where I show you my decorating plans for the holidays.  If you’re a new follower, let me fill you in on my obsession with Christmas decorating.

Ever since I was little, I’ve loved decorating Christmas trees, hanging stockings and wrapping gifts. I remember making ornaments with my dad and sitting in front of the silver tinsel tree in awe. Once I graduated from college and got my first apartment, I couldn’t wait to put up my own tree. And when I got married I started creating a theme for my decor and 27 years later, the tradition continues.

 Last year I shared the details on exactly how I develop my holiday decorating theme. And if you missed it, you can see how I decorated using my favorite colors in 2017 and how my 2016 Christmas theme was inspired by wrapping paper.

 This year my holiday theme is inspired by my love for blue and white and my collection of ginger jars.  I’m calling my theme…

Chinoiserie Christmas With A Pop Of Pink!

Read the Post

Ornaments On A Stick | An Easy Christmas Craft

Happy Thursday friends.  I’ve got a super easy Christmas craft to share with you today and I think you’re going to love it.  These are what I call Ornaments On A Stick!

Years ago when my home decor store was open, I carried a similar item and they were a top seller. Since I haven’t at market in the last 5 or 6 years, I decided I was going to make my own.

I’m almost embarrassed to share the easy DIY steps to make these but here goes.  You only need a few supplies:

 Shatter Proof Ornaments–Wal-Mart, At Home and Hobby Lobby are my go to sources for shatter-proof ornaments in different color, shapes and sizes.  I used an assortment of mini and large styles from At Home to make mine.  (note: this craft will also work with glass ornaments)

Wood Skewers–you can find these at Hobby Lobby and even at the grocery store.  I used long skewers for my ornaments but you can also use short cocktail size sticks as well.

Hot Glue Gun–a glue gun is a great tool for everyone to own even if you’re not a crafter.  I have this cordless glue gun on my Christmas wish list.

And now the hard part….

Using your skewer, punch a hole into the cap of the ornament and insert the skewer into the hole a couple of inches.  Add a few dots of hot glue around the hole and skewer to secure it in place and let it dry.  Ta da,  you’ve got a fun holiday decor piece to decorate with.

Ornaments On A Stick are great to add to a Christmas tree or mantel garland.  And if you use a short skewer, they will also work on a wreath.

Another fun idea is to add them to a flower bouquet or plant that you’re giving as a holiday hostess gift.

Or you can make a holiday door cone like I did and insert a few sticks to dress it up.

And if you really want to go all out, make a super sized version of Ornaments On A Stick to use in your outdoor planters.  Just use oversized ornaments and replace the skewers with wood dowels.

P.S.  This is a fun craft to do with kids.

♦ Ornaments On A Stick ♦

Happy holiday crafting!

Merry & Bright Holiday Home Tour–All Around The House!

And all through the house…

Welcome to the finale of the Merry & Bright Holiday Home Tour.   This year’s home tour started off with a bang and now it’s time to wrap up the series with lots of holiday cheer.

If you’re coming over from Green With Decor welcome!  Meg has such a cute home and I love all of the holiday decorating ideas she’s shared in the home tour.

I’m so happy to invite you into my holiday home and share more of my decor with you.  I think I mentioned in an earlier post that I like to add holiday touches throughout my house.   Today I’m sharing those little touches with you so grab a cup of cocoa, sit back and enjoy!

Big thanks to Amara and SmithHönig for sponsoring this holiday home tour. Products were provided from each – however all opinions are 100% my own.

♦♦♦

Let’s start with the coffee table.  The only holiday decor I added to the table was a small red mercury glass tree under a cloche.  It’s a simple decorating idea that has an elegant feel and I love the way it looks.

The red tree on the coffee table coordinates with the red mercury glass trees on the dining room sideboard.  The arrangement on the sideboard is another simple and easy decorating idea.

I added a holiday touch to the sofa with the addition of a solid red pillows and a Merry Christmas pillow that I bought at HomeGoods last year.

Christmas In the Kitchen

I didn’t do much decorating in the kitchen.  A mini tree in a blue and white cachpot sits on the kitchen island and a small wreath hangs over the stove.

Christmas DIY

I didn’t do much holiday crafting this year but I did make this cute cone door hanger.  I’ll share the DIY tutorial on the blog this weekend so stay tuned.  It’s super easy to make and is a unique hostess gift if you have a party coming up.

We’ve only hung one piece of artwork since we moved into the house so I hung this wreath on one of the stair walls.  This was a DIY too that literally took me about 20 minutes to make.

I purchased the wire wreath form from At Home and added some of the pretty pink ornaments I received from Amara.  I’ve loved using these Amara ornaments on my tree, mantel garland and now this wreath.  FYI–Amara is have a big sale of their Christmas decor so now is a great time to stock up for next year.

I hung a preserved boxwood wreath on the door at the top of the stairs and added a multi-layered bow.

ribbon from Costco

Christmas in the Master Bedroom

I deviated from my red and pink color theme in the master bedroom and used blue and green ornaments to decorate a small tree. A pair of wreaths hangs on the doors to the bathroom and I draped swags on the corners of the armoire.

Because the tree doesn’t have lights on it, I used different size and finishes of ornaments to give the tree visual interest. And instead of using the tree stand that came with the tree, I put the tree in a beautiful silver urn that a friend gave me.

Since our bed is the focal point in the room,  I hung a wreath on the headboard and draped garland around the edge. The garland really makes the room feel cheerful.

Do you recognize the sign in the middle of the wreath?  It’s actually a charger plate from the Target Dollar Spot.  I attached it to the wreath using a wire plate hanger.

wreath pillow from HomeGoods

A grouping of silver mercury glass trees sits on our dresser and relates back to the silver urn the tree is in.

And to round out our holiday decor is some of my gift wrap.  I still have lots of gifts to wrap  but here’s a look at a couple of the boxes dressed up so far.  I’ll be sharing more of my Christmas gift wrap along with some of my favorite gift wrapping tips on Friday.

Thanks for stopping by friends. I’ve loved sharing my holiday home with you this year.  Be sure to stop by Positively Southern, the next stop of the home tour.  And then check out all of the other participating bloggers to see their Merry & Bright Holiday Homes.


ConfettiStyle

Positively Southern

M. Jones Style

Rover At Home

Chic On A Shoestring Decorating

Love Your Abode

Green With Decor

Cheers to the season!


Disclaimer: This blog hop is sponsored by Amara and SmithHönig. Products were provided from each – however all opinions are 100% my own.

Merry & Bright Holiday Home Tour–Part 2


Christmas Decor by ConfettiStyle--Merry & Bright Holiday Home Tour

Welcome friends to Part 2 of the Merry & Bright Holiday Home Tour.  I’m excited to share more of my holiday home with you.  If you missed the Part 1 of the tour and the unveiling of my Christmas tree, you can find it here.

For those of you coming over from Positively Southern, welcome. Tamyra’s decor is so lovely and exudes southern elegance and beauty.

Today I’m sharing my dining room, holiday bar cart and the fun accent I added along our stair rail.   First up is the dining room.

Come gather at our Christmas table…

Christmas Decor by ConfettiStyle--Merry & Bright Holiday Home Tour

The main level of our townhouse is an open concept so the dining space flows into the living room. I continued the colors on my tree (red & hot pink) into the dining room decor and on to my holiday tablescape.

Christmas Decor by ConfettiStyle--Merry & Bright Holiday Home Tour

When it comes to entertaining, I love an overly layered table.  I chose not to use a tablecloth and instead let the placemats and table runner serve as the first layer of my table decor.  The table, runner which you get a glimpse of below, has a modern pattern which mixes well with the other elements on the table.  Don’t worry, you’ll get to see more the runner in just a bit.

Christmas Decor by ConfettiStyle--Merry & Bright Holiday Home Tour

I pulled out this vintage swan to use as the centerpiece and absolutely love the whimsy it adds to the table.  Pink roses and a few evergreen and eucalyptus sprigs created a really lush and glamorous arrangement.

Flanking the swan are red mercury glass vases with red silk peonies.   And since every tablescape needs candles, I added white taper candles in crystal candle holders.

Christmas Decor by ConfettiStyle--Merry & Bright Holiday Home Tour

Christmas Decor by ConfettiStyle--Merry & Bright Holiday Home Tour

Christmas Decor by ConfettiStyle--Merry & Bright Holiday Home Tour

I kept the place settings simple and made sure to incorporated both pink and red to coordinate with the rest of my decor.  The glass charger plates and white china with a silver rim add a little bling to the table.   The chargers have a beaded bottom which also adds a lot of sparkle.

Hot pink dinner napkins sit on top of the salad plates and on top of it sits a red & gold holiday appetizer plate.

tablescape tip:  don’t be afraid to mix silver and gold in your table settings.

Christmas Decor by ConfettiStyle--Merry & Bright Holiday Home Tour

Here’s a closer look at the reversible table runner from SmithHonig.  It so beautiful and I couldn’t be happier with how it looks with table decor.  The top of the runner features the Ashes Of Roses fabric and the bottom is red velvet.

SmithHönig is a line of textiles, art, furniture & furnishings from award-winning designer Kellie Smith & visual artist & travel blogger Melanie Hönig.  Their product line includes pillows, linens, fabric-by-the-yard and wallpaper. If you’re looking for unique decor and fabrics for your home, you’ll definitely want to check out SmithHonig.

All is merry, all is bright…

Christmas Decor by ConfettiStyle--Merry & Bright Holiday Home Tour

One of my favorite elements on the table are the Mario Luca Giusti Dolce Vita Acrylic Wine Glasses.  These beauties are from the UK-based decor and gift company Amara.  The green is such a rich and vibrant color and I love the fact that they are lightweight and unbreakable. Wine glasses are just one item in Amara’s acrylic tabletop collection which includes pitchers, tumblers, champagne glasses and more.

Christmas Decor by ConfettiStyle--Merry & Bright Holiday Home Tour

If you saw my Christmas tree last week, you’ll remember that I used tissue paper honeycomb balls to decorate it.  Well, look what I found in my stash of entertaining  goodies?  These cute honeycomb ball hors d’oeuvre picks.  They couldn’t be more perfect with my Christmas theme.

Christmas Decor by ConfettiStyle--Merry & Bright Holiday Home Tour

The dining room chandelier that was in the house when we bought it is not my style.  I plan to replace it next year so for Christmas I used holly leaf and berry garland to camouflage it a bit.

Christmas Decor by ConfettiStyle--Merry & Bright Holiday Home Tour

The side board is decorated with a grouping of red mercury glass trees, greenery sprigs and round ornaments in pink and red.

Christmas Decor by ConfettiStyle--Merry & Bright Holiday Home Tour

Christmas Decor by ConfettiStyle--Merry & Bright Holiday Home Tour

’tis the season to be jolly…

I placed my bar station on the far side of the living room, next to the door that leads to the deck.  Instead of a traditional bar cart, I used this three-tier table that I  scored it at a flea market for $30. It’s perfect for holding bottles, glassware & bar accessories.

Christmas Decor by ConfettiStyle--Merry & Bright Holiday Home Tour

preserved boxwood wreath  // 1 1/2″ wide red satin ribbon

Christmas Decor by ConfettiStyle--Merry & Bright Holiday Home Tour

The mini Christmas tree is sitting in my DIY blue and white ice bucket.  You can read all about how I made it here.


Christmas Decor by ConfettiStyle--Merry & Bright Holiday Home Tour

DIY Monogram Drink Stirrer //  vintage monkey (similar here)

Christmas Decor by ConfettiStyle--Merry & Bright Holiday Home Tour

And finally, here’s a look at our stair banister all dressed up for Christmas.

I swagged garland along the banister and hung iron bells and ornaments at different intervals.  The metal bells are from one of my favorite stores in Norcross called The Shops Of Antique Traditions.

Christmas Decor by ConfettiStyle--Merry & Bright Holiday Home Tour

red ribbon // hot pink ribbon

Christmas Decor by ConfettiStyle--Merry & Bright Holiday Home Tour

Christmas Decor by ConfettiStyle--Merry & Bright Holiday Home Tour

Christmas Decor by ConfettiStyle--Merry & Bright Holiday Home Tour

Well, that’s it for this week. I’ll be back next Wednesday, 12/13 for the finale of the Merry & Bright Holiday Home Tour to share the rest of my holiday decor.

Now it’s time to hop over to Chic On A Shoestring Decorating to see more of Kate’s holiday home.  Last week she shared her Christmas tree and it was stunning. I know you’re going to love what she has to share this week.

And be sure to stop by the other Merry & Bright blog participants to see their holiday homes!

Merry & Bright Holiday Home Tour

Green With Decor

Rover At Home

Love Your Abode

Positively Southern

ConfettiStyle

Chic On A Shoestring Decorating

M. Jones Style

Thanks for stopping by!

Disclosure: Some of the products featured in this blog post were provided by Amara and SmithHönig as part of the Merry & Bright Holiday Home Tour. All opinions, images and holiday cheer are 100% mine.

Copyright © 2024 · Theme by 17th Avenue

Copyright © 2024 · Amelia on Genesis Framework · WordPress · Log in