As I am adding the finishing touches to my bedroom makeover, I decided to create a one-of-a kind tassel to hang on the door.

I’ve always loved tassels and have them all over my house. To me, tassels are just the touch you need to add a bit of detail to a piece of furniture, entrance door or curtain tie-back.
If you’re needing a finishing touch for a room in your home, try making your own hand-crafted ribbon tassel.
Here’s the how-to:
Supplies needed:
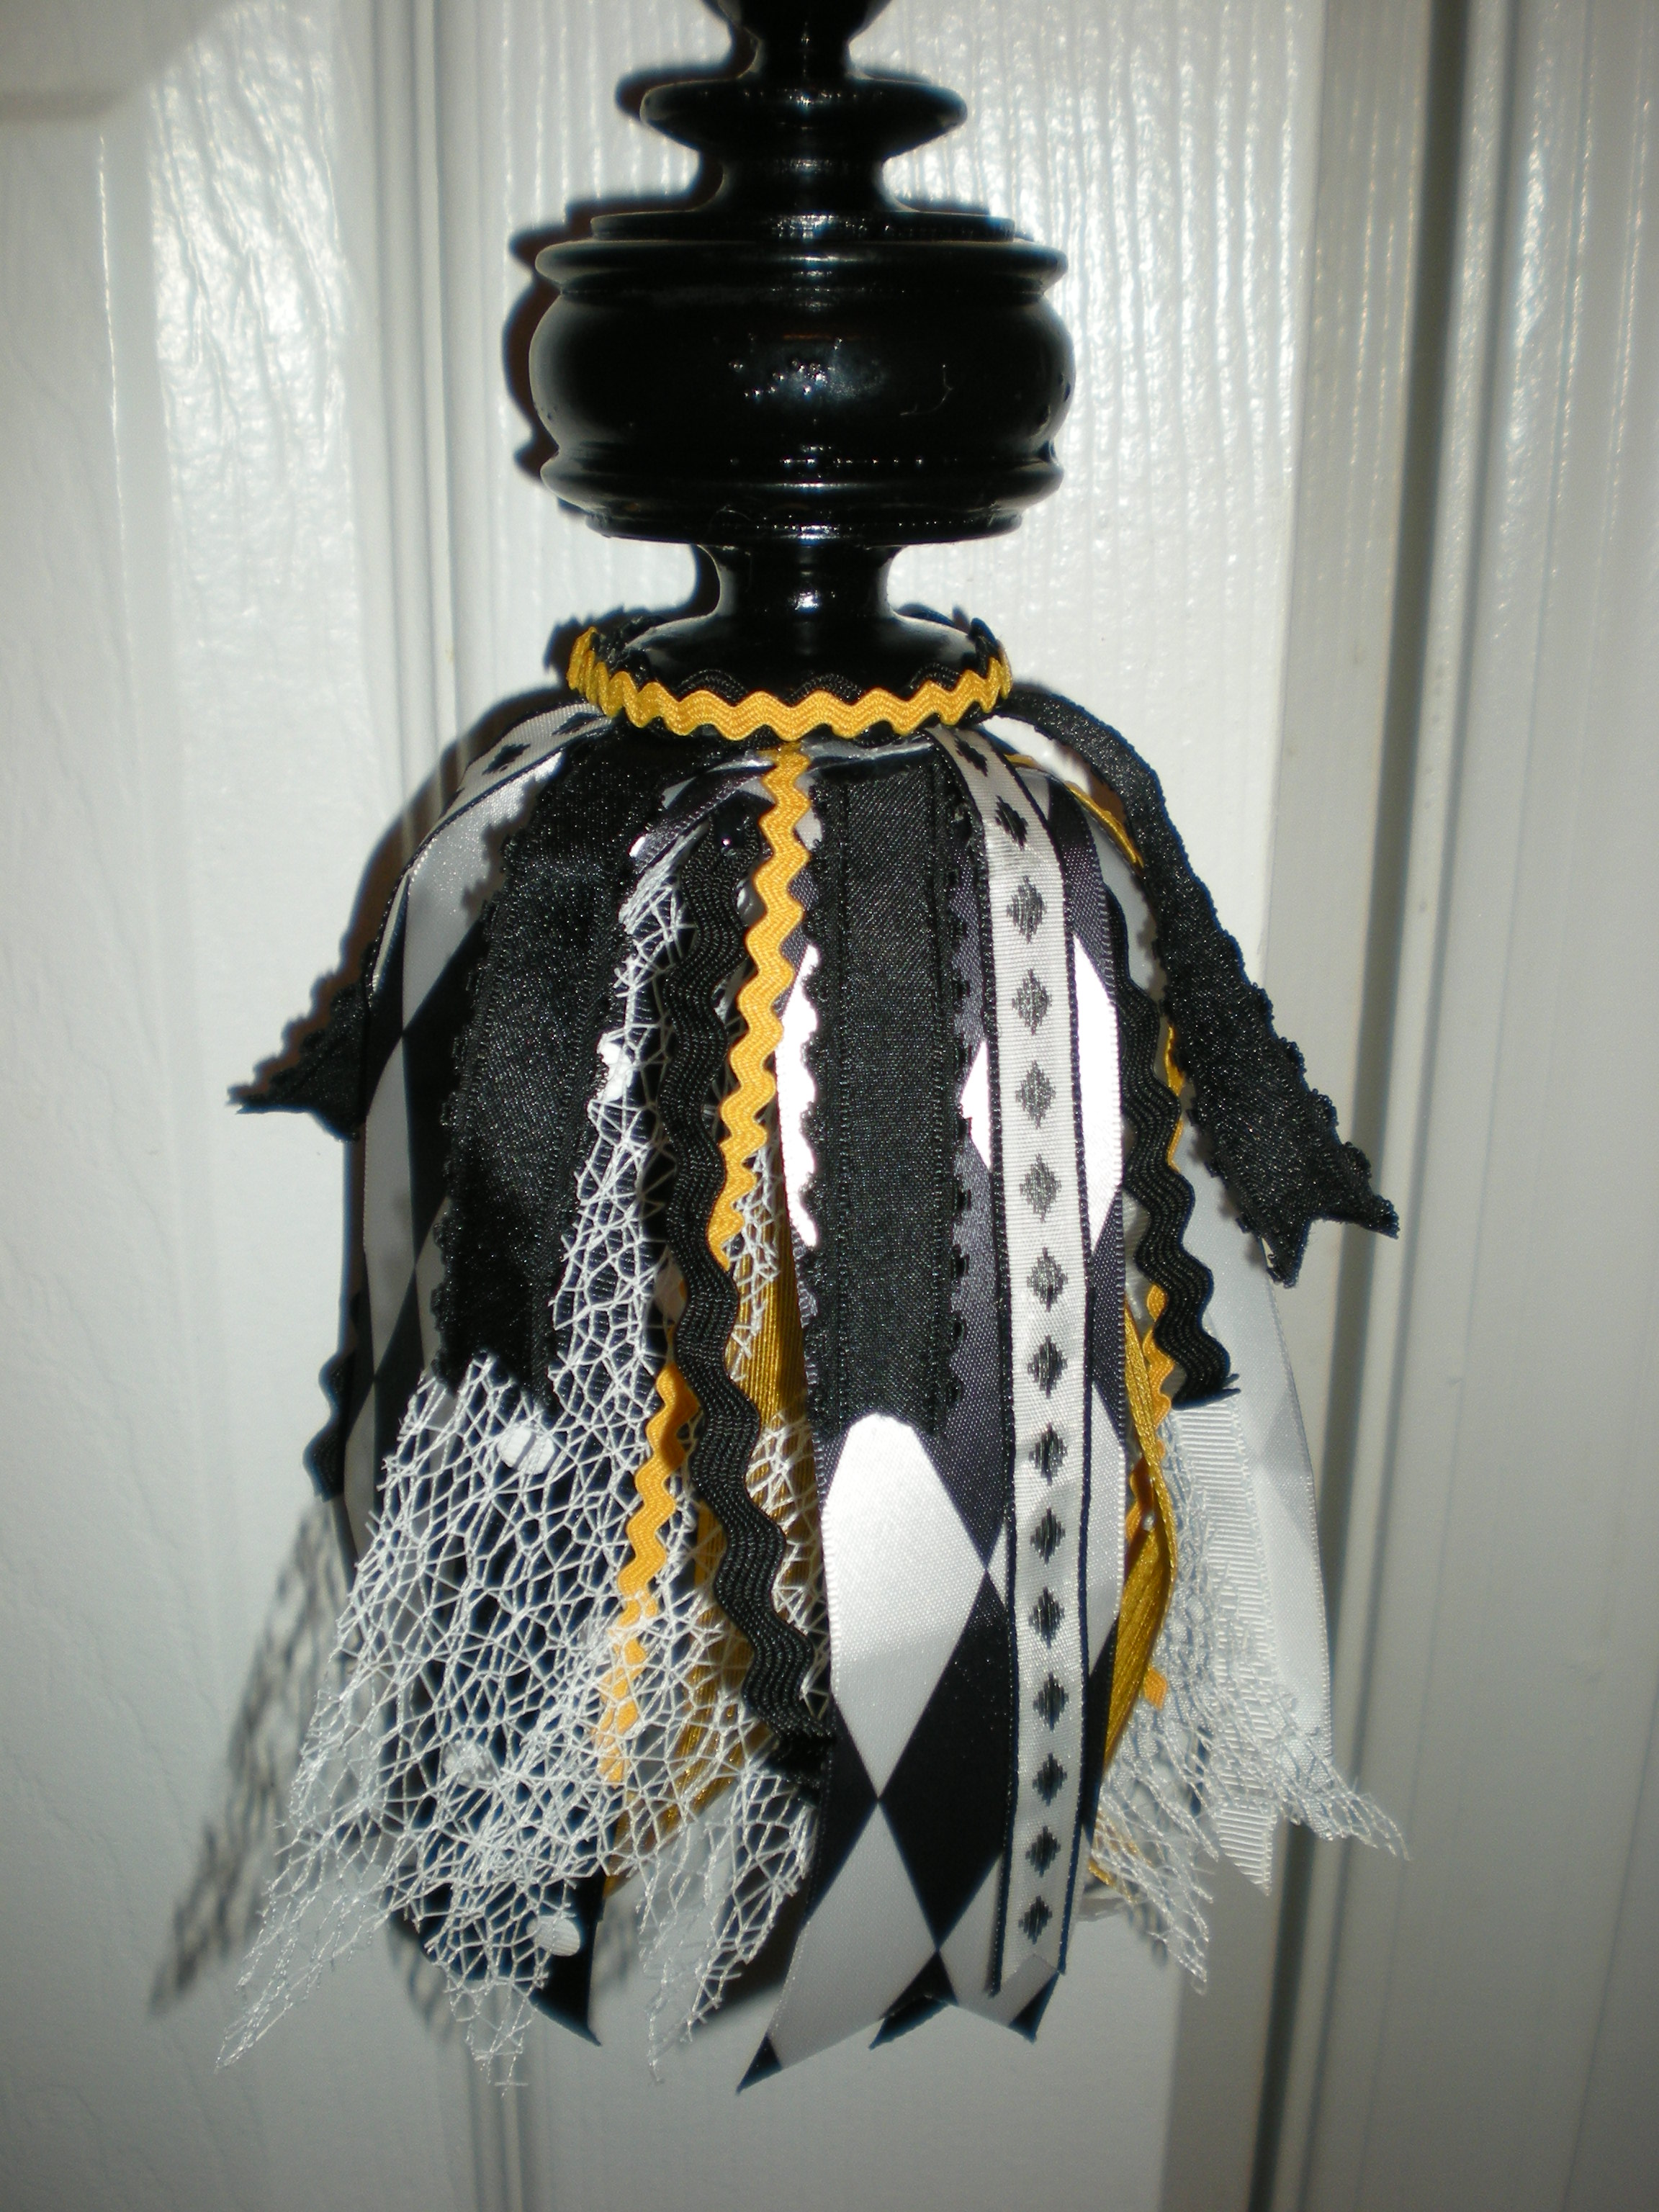
- Wood Finial—you can find a variety of styles at your local hardware store or at a flea market like I did. (I paid $2.00 for mine).
- Spray Paint—in a color to coordinate with your theme. My color theme is black, white and yellow.
- Ribbon of your choice. I used the following May Arts Ribbon styles: EM10, AR10, AH27, AKN10, ARR27, 336-38-10, BH09, DH10, ADD10, 341-10, 347-78-10
- Hot Glue Gun
- Scissors
- Bead (for dowel top)
In order to get your finial ready for your tassel, you need to do two things:
- Drill a small hole into the top of your finial. This hole will be used to secure your ribbon handle.
- Spray paint your finial to work with your color theme. My finial was originally stained brown, so I spray painted it a high gloss black to coordinate with my ribbons.
Next, you can create your hanging loop. To do this, I threaded both ends of a 10” length of ribbon through a large silver bead. I knotted the loose ends of the ribbon to keep the bead on.
Now you’ll need to cut your ribbon into various lengths. Having different lengths of ribbon within your tassel will give it more movement and interest.
I cut selected ribbons in 13” lengths, 11” lengths, 9” lengths and 7” lengths.
Once all my ribbon lengths are cut, began gluing them to the bottom of my finial.
I glued one style of 13” ribbon on first by laying the ribbon face side up in a cross pattern. I glued the finial to the middle of the ribbons.
Next, I glued two pieces of 11” ribbon onto the finial bottom, followed by two pieces of 9” ribbon and lastly, two pieces of 7” ribbon. Continue gluing ribbons onto the finial bottom in various spots so that the lengths vary in position around the based of the finial.
Once all your ribbons are glued in place, glue your handle into the hole drilled at the top of your finial. Push your bead down so that it sits on the finial top.
I added a loop of 1/8” yellow ric-rac (ARR27) around the finial base to give a finishing touch.
And there you have it, a super easy, but very stylish Ribbon Tassel to give your home a little pizzazz!

That is beautiful! Now I need to start collecting finials to go with all the ribbon I’ve collected!
I never thought of making ribbon tassels until I saw them on Pinterest.
I doubt mine will be as good as this one, though.
Martha
Thanks for stopping by the blog Martha. Have fun making tassels for your home.
Shelly
What a great idea! The colors you used are so elegant. Very chic tassel!